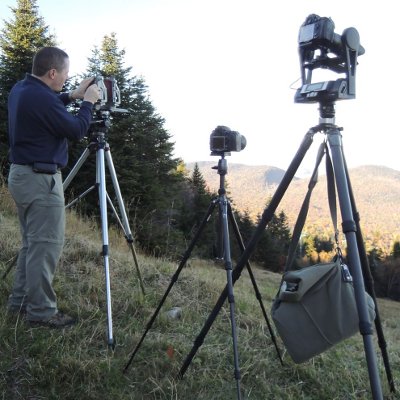
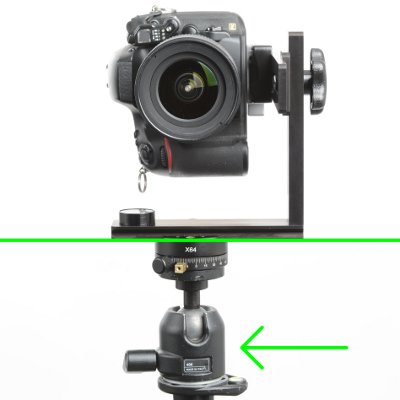
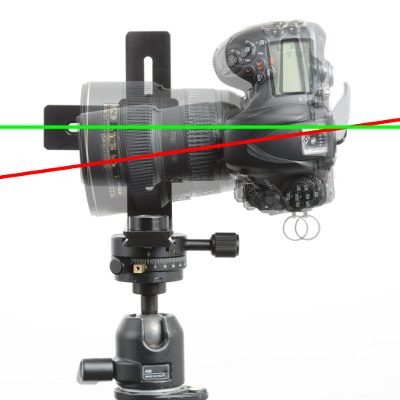
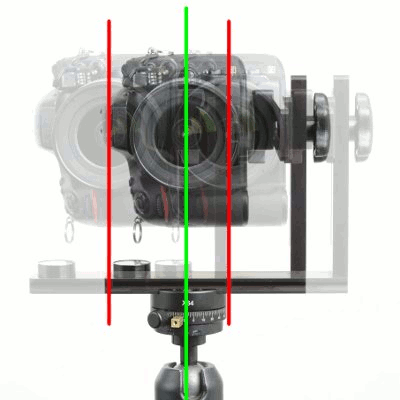
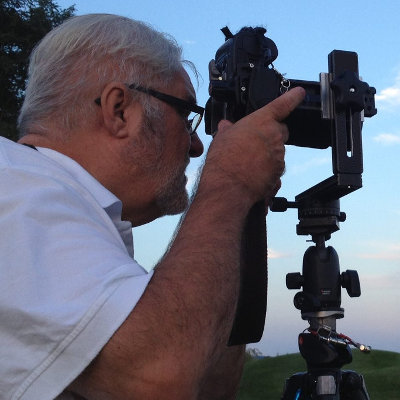
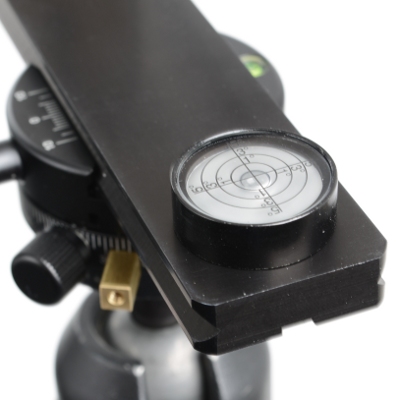
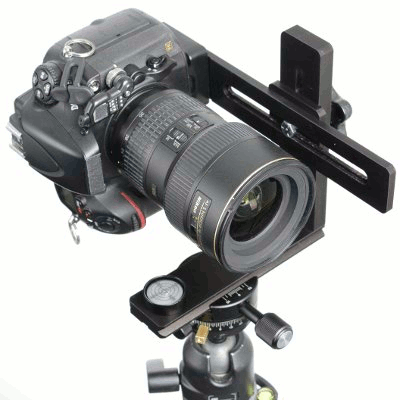
USER'S
GUIDE

EASY INSTALLATION

heads
heads

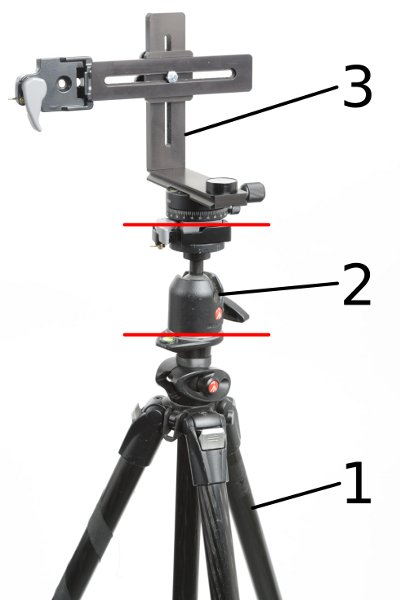
The Panoramic Head is very easy to install, simply put it over your tripod/head this way :


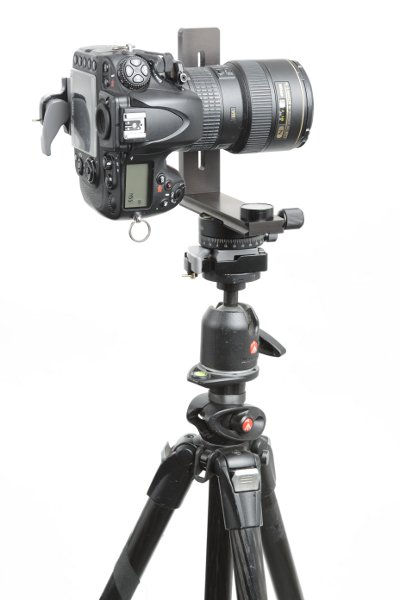
1 - Tripod : Use a solid tripod.

2 - Your head : Keep the head you already have on your tripod, it will be useful for leveling.

3 - Panoramic Head : put the panoramic head on top of the head you already have.


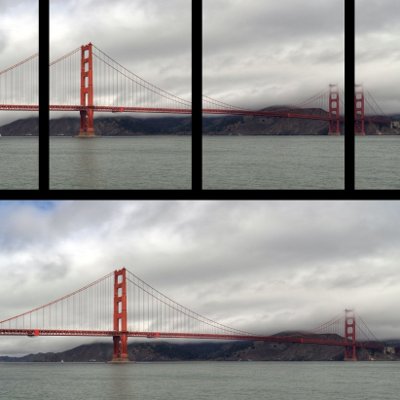
That's it ! You now have the simplest setup to do good quality panoramic photography !


HOW IT WORKS

Studio

STEP 1

Place your tripod where you want to make your photo.

Use a focal length that will cover the entire height of your subject, but not more.

Studio

STEP 2

Level the panoramic head, using the regular head under it.

The panoramic head MUST be leveled.

The better your level, the straighter your horizon will be on the final image.

Weddings

STEP 3

Make sure that your camera is leveled too.

The camera MUST be leveled.

If your camera rotates by itself because of its weight, be sure to strongly tighten the screw of its quick release plate.

Weddings

STEP 4

If needed, align the camera, so the nodal point is on top of the rotation axis.

Scroll down to the next section to learn what the nodal point is, and how we can adjust our panoramic head for it.

Weddings

STEP 5

Your Panoramic Head is ready! Take as many photos you need to cover your scene.

Be sure that exposure, focus and white balance are constant between shots

Studio

STEP 6

On your computer, use your favorite panoramic photography software to stitch your final image.

If you are new to panoramic imagery, look here to see software suggestions.

NODAL POINT ADJUSTMENT

NODAL POINT

The video on the right explains what the nodal point is.

It also shows why, when and how we can adjust our panoramic head for it.

THE VIDEO WILL COME SOON...

TO ACHIEVE BETTER RESULTS

Studio

FOCAL LENGTH

When stitching your photos together, you will see that the result will vary greatly depending on the focal length you use.

If you use a too wide lens, you will get weird lines that are cut at random places, giving a non realistic result.

If you use a too long lens, then you might not cover the entire scene.

A good rule is : use the longest lens you can that still covers your scene. This is why cameras on panoramic heads are always tilted on the side (portrait orientation).

Personally, I found that between 28mm and 70mm is ideal (full frame sensor), but that's my point of view. Please experiment on your own to meet your taste.

Studio

HEAD LEVEL

Be sure that the level is as perfect as you can. Especially if you are covering a wide field of view.

The better your level, the straighter your horizon will be on the final image.

Use the level that is on the panoramic head. I chose a big and precice level to make this task easy.

Events

CAMERA LEVEL

Be sure that your camera is straight, and not at an angle.

To do so, look at the quick release plate under the camera, it must be straight.

Better results are achieved if your camera is on level.

If your camera rotates by itself because of its weight, be sure to strongly tighten the screw of the quick release plate.

Weddings

STABILIZERS

Don't forget to turn off the stabilizer on your lens or camera.

Using a stabilizer when the camera is stable on a tripod will actually add blur in the image.

Weddings

OVERLAP

When taking your images, leave an overlap of 10% to 30%.

This way, the software will have better control points to assemble the final image.

Events

REVERSIBLE HEAD

The panoramic head I sell is reversible. The camera can be tilted either on the left or on the right.

This not only helps lefties, it also gives you better access to the switches on the side of your lens.

Try both sides, they each have their advantages.

STITCHING SOFTWARES

Studio

If you are new to panoramic photography, take the time to try at least a few stitching softwares. Take the time to compare the ease of use, and the quality of the results you get.

There is no bad software, only different needs and compatibilities.

Here are a few you can try out :

  Software  
  Ease of use  
  Compatibility  
  Result quality  
  Price  
  Adobe Photomerge CC  
  Intermediate  
  Windows / Mac  
  Good  
  Subscription  
  Hugin  
  Intermediate  
  Windows / Mac / Linux  
  Very good  
  Free  
  Panavue Image Assembler 3 Pro  
  Intermediate  
  Windows  
  Good  
  $$  
  Panavue Image Assembler 3  
  Beginner  
  Windows  
  Good  
  Free  
  Panorama Factory  
  Beginner  
  Windows / Mac  
  OK  
  $  
  Easypano Panoweaver 8  
  Intermediate  
  Windows / Mac  
  OK  
  $$  
  Microsoft ICE  
  Beginner  
  Windows only  
  Good  
  Free  
  PTGui  
  Intermediate  
  Windows / Mac  
  Very good  
  $ / $$  
  Kolor Autopano Pro  
  Intermediate  
  Windows / Mac / Linux  
  Excellent  
  $$  
  Kolor Autopano Giga  
  Advanced  
  Windows / Mac / Linux  
  Excellent  
  $$$  


CONTACT


Cell: (514)965-3686

info@ericconstantineau.com

Longueuil, Québec, Canada

Facebook

Flickr

YouTube